Saturday, November 2, 2013

Self-reliance and selflessness

Last month's Visiting Teaching message fits in perfectly with what I have been feeling lately about Self-reliance. So I'm going to share parts of it with you, in case you didn't get a chance to read it.

Self-reliance is the ability, commitment, and effort to provide for the spiritual and temporal well-being of ourselves and of our families.1

As we learn and apply the principles of self-reliance in our homes and communities, we have opportunities to care for the poor and needy and to help others become self-reliant so they can endure times of adversity.

We have the privilege and duty to use our agency to become self-reliant spiritually and temporally. Speaking of spiritual self-reliance and our dependence on Heavenly Father, Elder Robert D. Hales of the Quorum of the Twelve Apostles has taught: “We become converted and spiritually self-reliant as we prayerfully live our covenants—through worthily partaking of the sacrament, being worthy of a temple recommend, and sacrificing to serve others.”2

Elder Hales counseled us to become self-reliant temporally, “which includes getting a postsecondary education or vocational training, learning to work, and living within our means. By avoiding debt and saving money now, we are prepared for full-time Church service in the years to come. The purpose of both temporal and spiritual self-reliance is to get ourselves on higher ground so that we can lift others in need.”3

President Young had great trust in the capacities, talents, faithfulness, and willingness of the women, and he encouraged them in specific temporal duties. While the specific duties of Relief Society sisters are often different today, the principles remain constant:
  1. Learn to love work and avoid idleness.
  2. Acquire a spirit of self-sacrifice.
  3. Accept personal responsibility for spiritual strength, health, education, employment, finances, food, and other life-sustaining necessities.
  4. Pray for faith and courage to meet challenges.
  5. Strengthen others who need assistance.4
The world shouts the exact opposite message, so loudly that we can be easily swept up in it's selfish, idle, material mantra. And that is exactly what the the adversary wants. Self-reliance is empowering and selfless. Being able to take care of ourself and family puts us in the position of being able to help others in need. But if we are swallowed up in debt, and are dependent on others we really can't help those in greater need. The same goes for our spiritual self-reliance.

It makes me think of the parable of the ten virgins. Half were wise and prepared, half were foolish and were not prepared. Be wise and add the necessary oil to your lamps, both temporally and spiritually. Be persistant and patient in your efforts to become self-reliant. As you do, line upon line,  drop by drop,  you will be ready and prepare for the coming of the Bridegroom.

Winter Food Storage Tips:

For long storage life, when harvesting winter squash it's important to leave some of the stem attached to the fruit. After harvesting, let your squash cure in a warm place (75 to 80 degrees F.) for 10 days or so. When ready for storage the outer skin should be very firm. Store winter squash in a cool (to to 60 degree F) place that’s well ventilated.  Check your stored squash monthly to make sure you use it up before it shows sign of decay.

Your potatoes can be dug and “cured” for storage. Curing toughens up a potato’s skin and extends its storage life. Cure the tubers by laying them out on newspaper in a well-ventilated place that’s cool (50 to 60 degrees F.) and dark (so they don’t turn green). After about two weeks, the skins will have toughened up. Rub off any large clumps of dirt (potatoes should never be washed before storage). Store your spuds into ventilated bins, bushel baskets, or a cardboard box with perforated sides. Completely cover the boxes or baskets with newspaper or cardboard to eliminate any light. Even a little light will cause potatoes to turn green and be rendered inedible. The ideal storage temperature for potatoes is 35 to 40 degrees, though they will usually keep for several months at 45 to 50 degrees.

For carrots, because of our cold climate, you can store them right in the ground and have garden fresh carrots all winter long! Be sure to cover the carrots with 12" of straw, leaves, even grass clippings. Be sure to dig them all up before the soil begins to warm up in early spring.
Monday, September 2, 2013

Homemade Fruit Leather Recipe


Yield: 2 pans of fruit leather-about 20 fruit roll-ups

Homemade fruit leather is so easy to make and is a great healthy snack! Feel free to use your favorite fruit. Strawberries, raspberries, peaches, plums are all great options. 

3 cups ripe chopped fruit 
Tablespoon or 2 of lemon juice to keep it from browning
Sweeten to taste with agave, honey or sugar (most times I opt out)

Directions:
Preheat oven to the lowest temperature your oven will go. Line a 11 x 17 baking sheet with parchment paper, plastic wrap or a Silpat baking mat. Set aside.

Puree the fruit, lemon juice and sweetener in a blender or food processor until smooth. Pour fruit mixture onto prepared baking sheet and spread to about a 1/8″- 1/16” thick, depending on your preference. I usually spread it pretty thin. An off-set spatula is the perfect tool to spread it out evenly. The thinner it is, the faster it will cook. I always pound the baking sheet on the counter a few times to make sure the fruit mixture is evenly distributed. 

Place baking sheet in the oven and bake for 3-8 hours (depending on thickness), until pan is set and the center is not tacky. You can cook two pans at a time as long as you rotate every hour. I also stick a knife in the door of the oven, so that it is a little ajar, since my oven doesn’t cook as low as others. 

Remove from oven and let cool to room temperature. Gently peel off the fruit leather from the Silpat, or remove with the plastic wrap or parchment paper. Cut into squares or strips with scissors or pizza cutter. I cut them into 2 inch strips the short way. Then I simply roll them up. Store in an air-tight container.


Sunday, September 1, 2013

Freezer Jam Recipes


Strawberry Freezer Jam
3-1/4 cups prepared fruit (buy about 2 qt. fully ripe strawberries)
1/4 cup fresh lemon juice
1 box MCP Pectin
1 cup corn syrup
4-1/2 cups sugar, measured into separate bowl

CRUSH strawberries thoroughly, one layer at a time. Measure exactly 3-1/4 cups crushed strawberries into large bowl. Stir in lemon juice. Stir in pectin; let stand 30 min., stirring every 5 min. Stir in corn syrup. Gradually add sugar, stirring until well blended. Stir an additional 3 min. or until sugar is completely dissolved and no longer grainy. (A few sugar crystals may remain.)
FILL all containers immediately to within 1/2 inch of tops. Wipe off top edges of containers; immediately cover with lids. Let stand at room temperature 24 hours. Jam is now ready to use. Store in refrigerator up to 3 weeks or freeze extra containers up to 1 year. Thaw in refrigerator before using.  Makes about 7 (1-cup) containers. 

Apricot Freezer Jam
3 cups prepared fruit (buy about 3 lb. fully ripe apricots) 
1/2 cup fresh lemon juice 
1 box MCP Pectin 
1 cup light corn syrup 
4-1/2 cups sugar, measured into separate bowl 

PIT and finely chop unpeeled apricots. Measure exactly 3 cups fruit into large bowl. Stir in lemon juice. 
STIR pectin into prepared fruit in bowl. Let stand 30 min., stirring every 5 min. Stir in corn syrup. Gradually add sugar, stirring until well blended. Stir an additional 3 min. or until sugar is completely dissolved and no longer grainy. (A few sugar crystals may remain.) 
FILL all containers immediately to within 1/2 inch of tops. Wipe off top edges of containers; immediately cover with lids. Let stand at room temperature 24 hours. Jam is now ready to use. Store in refrigerator up to 3 weeks or freeze extra containers up to 1 year. Makes about 7 (1-cup) containers. 

Plum and Grape (Glum) Freezer Jam
2 cups plums and 1 cup grape juice (I just use frozen grape concentrate)
1 box Pectin (boil in 1 cup water)
1 t butter or margrine to prevent foaming (optional)
5 cups sugar, measured into separate bowl 

PIT and finely chop or grind peeled plums. Measure exactly 3 cups prepared fruit/ juice into large bowl.
Add the sugar, mix well, and let stand for 20 minutes. Stir occasionally.
DISSOLVE powdered pectin in one cup water in a saucepan. Bring to a boil for one minute. Add pectin solution to the fruit and sugar mixture. Stir vigorously for two minutes.
POUR the jam into clean freezer containers or canning jars, leaving one-half inch headspace. Cover the container and let stand for 24 hours, or until the jam has set and is firm. Store in freezer until ready to use.  Makes about 7 (1-cup) containers. 

Cherry Freezer Jam
3 cups prepared fruit (buy about 3 lb. fully ripe sweet cherries) 
1/2 cup fresh lemon juice 
1 box MCP Pectin 
1 cup corn syrup 
4-1/2 cups sugar, measured into separate bowl 

STEM and pit cherries. Finely chop or grind fruit. Measure exactly 3 cups prepared fruit into large bowl. Stir in lemon juice. 
ADD pectin; stir. Let stand 30 min., stirring every 5 min. Stir in corn syrup. Gradually add sugar, stirring until well blended. Stir an additional 3 min. or until sugar is dissolved and no longer grainy. 
FILL all containers immediately to within 1/2 inch of tops. Wipe off top edges of containers; immediately cover with lids. Let stand at room temperature 24 hours. Jam is now ready to use. Store in refrigerator up to 3 weeks or freeze extra containers up to 1 year. 
Makes about 7 (1-cup) containers.

Raspberry-Peach Freezer Jam
3-1/4 cups prepared fruit (buy about 2 pt. fully ripe raspberries and 1-1/2 lb. fully ripe peaches)
1/4 cup fresh lemon juice
1 box MCP Pectin
1 cup light corn syrup
4-1/2 cups sugar, measured into separate bowl

CRUSH raspberries thoroughly, one layer at a time. Press half of pulp through a sieve to remove seeds, if desired. Measure exactly 1-1/4 cups prepared raspberries into large bowl. Peel and pit peaches. Finely chop or grind fruit. Measure exactly 2 cups prepared peaches into bowl with raspberries. Stir in lemon juice.
STIR pectin into prepared fruit in bowl. Let stand 30 min., stirring every 5 min. Stir in corn syrup. Gradually add sugar, stirring until well blended or until sugar is completely dissolved and no longer grainy.
FILL all containers immediately to within 1/2 inch of tops. Wipe off top edges of containers; immediately cover with lids. Let stand at room temperature 24 hours. Jam is now ready to use. Store in refrigerator up to 3 weeks or freeze extra containers up to 1 year. 
Makes about 7 (1-cup) containers.

Strawberry Rhubarb Freezer Jam
2 cups sliced rhubarb
1 1/2 cups crushed strawberries
1/4 cup fresh lemon juice
1 box MCP Pectin
1 cup corn syrup
4-1/2 cups sugar, measured into separate bowl

COOK rhubarb in water for 5 to 6 minutes until rhubarb is tender. Strain and add to crushed strawberries. Stir in lemon juice. 
STIR in pectin; let stand 30 min., stirring every 5 min. Stir in corn syrup. Gradually add sugar, stirring until well blended. 
FILL all containers immediately to within 1/2 inch of tops. Wipe off top edges of containers; immediately cover with lids. Let stand at room temperature 24 hours. Jam is now ready to use. Store in refrigerator up to 3 weeks or freeze extra containers up to 1 year. Thaw in refrigerator before using.

Freezer Jam Made Easy


Strawberries, raspberries, blueberries, apricots, nectarines, peaches, cherries and plums everywhere! Making jam can be an ambitious undertaking.  Who wants to stand over a boiling water bath for hours on end? For times like this, there's freezer jam ! Canning purists may cry "sacrilege!" at the very mention of freezer jam, but there are good reasons for its growing popularity: it's easy, safe, and, since the jam is never cooked, it tastes like fresh fruit. 

Fruit
Use perfectly ripe fruit for freezer jam. Most fruit contains pectin, a natural jelling agent. Unripe fruit contains a greater quantity of pectin, and the pectin levels diminish, the riper the fruit gets. Jam made with under ripe fruit may jell too much, and jam made with over ripe fruit may not jell enough. 
Pectin
Traditional jam recipes call for cooking. This process thickens the jam. Since you don't cook freezer jam, most recipes call for additional pectin to thicken it, giving the mixture that jelled consistency you expect from your preserves. Store-bought pectin comes in two forms - powder and liquid. These are NOT interchangeable - you should use whichever form your recipe calls for. 
Sugar
Sugar inhibits the growth of bacteria, keeping your jam fresh and fruity and safe to eat. Jam recipes are formulated to call for a certain ratio of pectin to sugar, and they will not jell properly if you don't use the correct amount of sugar. If you'd like to make jam with less sugar, you'll need to buy a special kind of pectin.
Containers
Use either sturdy plastic containers with tight-fitting lids, or short, wide-mouthed glass jars made especially for the freezer. It's best to choose containers that are no bigger than pint-size; the jam will not set up as well in larger containers. Wash them as you would any other dishes; there's no need to boil them like with traditional jam making. 
Making it
Sort and wash fruit. Drain. Remove caps and stems from berries, and crush.
The basic recipe for freezer jam is...
3 cups crushed berries
5 cups sugar
1 package powdered pectin in one cup of water. 
You'll need about one and a half quarts of whole berries to make 3 cups crushed berries. For best results refer to the directions that come in the pectin box. 
To make the jam, measure three cups of prepared fruit into a large mixing bowl. Add the sugar, mix well, and let stand for 20 minutes. Stir occasionally.
Dissolve powdered pectin in one cup cold water in a saucepan. Bring to a boil and boil for one minute. Add pectin solution to the fruit and sugar mixture. Stir vigorously for two minutes.
Pour the jam into clean freezer containers or canning jars, leaving one-half inch head space. Cover the container and let stand for 24 hours, or until the jam has set and is firm. This quantity makes about seven half-pint jars or freezer containers.
Thaw jam from the freezer overnight in the refrigerator. If the jam is too firm, soften it by stirring. If it tends to separate, stirring will blend it again. If freezer jam is too soft, bring the jam to a boil in a saucepan for one minute and it will thicken as it cools. Store in the refrigerator.
Tips
*If you are a bit short on fruit, add a can of crushed pineapple.  It blends perfectly with all fruit.
*Premeasure ingredients before hand. It makes it run much smoother.
*If doing several batches at a time, use a timer or write down start times for each batch.
*Buy containers from the deli department, much less expensive.
* If your fruit is ready for jam, but you just don't have the time.  Freeze it so it doesn't go bad.  You can pit, cut and freeze, or smash or puree with lemon juice, premeasured for a later time.  Works great!

Try different fruit combinations like...  
raspberry peach
strawberry rhubarb
plum grape
apricot pineapple
three different berries

Harvest Time


2 Corinthians 9:6
But this I say, He which soweth sparingly shall reap also sparingly; and he which soweth bountifully shall reap also bountifully. 

I love this time of year, when you finally get to enjoy the fruits of your labors. Is there anything better than a fresh peach, or a perfectly ripe tomato? It wonderful to be able to enjoy all of the deliciousness of the garden. It's even more wonderful to preserve your harvest for the upcoming winter and add to your three month supply! It's so empowering to fill bottle after bottle with free delicious food, granted it's a lot of work, but so worth it! The next few posts will be dedicated to canning, preserving, dehydrating your bounty. Even if you didn't have the chance to plant a garden this year, there are those around you that will share, especially zucchini. 

This week I came across plums and grapes from others that simply had too much. I never turn away free fruit! With the plums I made glum jam, no it's not a typo, glum jam. It's a McBride recipe that has been passed down. It's simply grape and plum jam. Technically it's suppose to be a jelly, but let's face it, most years I'm too lazy to add the extra step of straining, so I opt for jam. It's just as yummy, just not as pretty. With school starting, we are in need of restocking our jam supply for the daily pb & j. Jam is an easy way to preserve just about any fruit you have, especially if they are a bit over ripe and are not being eaten fast enough.  I also made fruit leather, enough to supply a healthy, all natural snack for my kids school lunches for several weeks. It is ridiculously easy to make, and so cheap. Any fruit will work, with the exception of watery melons. And I steamed the grapes and made 8 quarts of fresh grape juice. All for free! It takes a bit of planning and a bit of time, and you'll probably acquire a few fruit flies ( I have a remedy for that) but you can save money and add to your food supply so quickly, you'll be amazed! 

I'll be posting instructions and recipes the next week so you too can be on a self-sufficient high!


Tuesday, May 21, 2013

Rotation is Key


I can’t believe it is already May, how time flies. It’s a great time to asses what you have used since the start of the year and make sure that you  are replenishing what you have been using. Coming up with a rotation system is key! Here are a few rotation ideas.
Weekly container method
This method works well if you organize your food storage with weekly menus. Create as many seven-day (breakfast, lunch, and dinner) menu plans of your family’s favorite meals (personally I would use this method only for the dinner meals) as fits your families eating preferences (a minimum of two different menu plans is recommended). Label each different seven-day menu plan with a different letter (A, B, C, etc.). Place all the non-perishable ingredients needed for each one-week menu in a separate container (plastic or cardboard box). Label each container according to the meal it contains (A, B . . .). For a three-month supply, you will need twelve containers – 6 each for each of two different menus (A and B) or four containers each of three different menus (A, B and C). At the beginning of the week, empty the next container in your rotation and place all the food in the pantry closest to your kitchen so you can use it during the week. To rotate your storage, refill that container with the same foods you took out. Don’t forget to date the foods or the container so you know in which order to use each one-week box of food products. Do not include in these containers food items that last a long time after they are opened such as oils, condiments, spices etc.
Two Columns Method
The idea is to arrange the items to be stored in two columns. Every time you need to remove a product from the shelf, take it from the right (these should be the ones that need to be used first). When the right column is empty, you slide the whole left column to the right, and re-stock on the left. This method is more practical to use when you just have about 20 or less of a certain item(s) you normally store in your pantry.
Color sticker method

Select colored stickers to represent year or half-year expiration periods (the frequency depends somewhat on the foods you are labeling). Place a sticker on all or some items in your food storage to correspond roughly with when the food items expire  or should be used. This provides a quick visual  key to how frequently or when foods should be rotated. Personally, I think placing stickers on every single can or box would require purchasing too many stickers to regularly use this method on all the products I store. This method works well for items stored in different areas of the house (under beds, tables etc.) where the expiration date is not easily visible. Place the stickers on an area of the products that can be easily seen.

Sticky Notepad Method
This is simple, practical and easy. Place a sticky notepad on the cupboard door, or near the storage shelf where your food storage is kept. Every time you remove an item, write what it is on the notepad. When it is time to prepare the weekly grocery list, tear off the sheet from the pad and stick it on your grocery list or write the item’s name directly on it.
Rubber-band method
One practical and easy method I personally like is the rubber band method. I find this method to work well with items that take longer to use after they are opened such as boxes of  bouillon cubes, vanilla flavoring etc. Your food items should be organized in a row and a rubber-band should be wrapped around the second-to-the-last container in the row. As you use your supply you’ll eventually come to the container with the rubber band around it then you know its time to buy more.

DIY tips for pinching pennies:
Use cinnamon as a substitute for rooting hormone. It also kills fungus and bacteria at the same time.
Next time you boil eggs, save the water and pour in on your garden and plants. The water becomes enriched with calcium from the egg shells. And speaking of eggs, if you haven’t already planted your tomatoes, crush egg shells and place them at the bottom of the hole when planting your tomatoes. 
DIY fertilizer: 1 teaspoon of epsom salt in 4 cups of water, spray on your plants for an increase in productivity due to a boost of magnesium. Works great for tomatoes, peppers, even roses. 
DIY weed killer: Every where I look, everyone seems to toot vinegar as a great, natural weed killer. Honestly I have not be super impressed, but it is definitely a safer option than Round Up. I just recently read that baking soda works as well. I’m willing to try, since you can buy a 5lb bag at Costco for about $5. Sweep baking soda in your sidewalk cracks and rock pathways to discourage weeds. 
DIY nontoxic ant killer: 1 cup water, 1/2 cup sugar, 2 tablespoons of Borax. Just mix till dissolved, soak a cotton ball with the solution, and place where you find unwanted ants. That’s it!
Now with all the money you have saved, you can add to your 3 month supply or year supply!

Tuesday, April 9, 2013

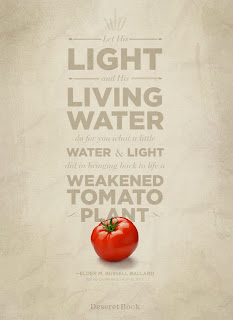
The Parable of the Tomato


I simply loved Elder Ballard's parable of the heirloom tomato plant this conference and it got me thinking about self reliance. Elder Ballard's talk


"I am reminded of a sweet seven-year-old showing her grandfather a small tomato plant she had started from seed as part of a second-grade school project.
She explained that from one tiny seed would come a plant. And if the plant were cared for, it would grow many tomatoes that would each have many seeds.
She said, “And if all of those seeds were planted and grew more tomatoes, and you planted all of those seeds, in a few seasons you would have millions of tomatoes.”
“All,” she said in amazement, “from one little seed.”"


Self reliance is not just a temporal principle, but a spiritual one as well. The difference that just one tomato plant can make, if we are willing to do the work, is amazing. From small things, great things come to pass. So here I am encouraging you all again to give gardening a try. Not only will it feed you this summer but can feed you throughout the next winter. Just last night we had puree soup I bottled, yummy bread and grape juice, all thanks to our garden and food storage.

There are countless lessons naturally taught by gardening, countless possibilites to teach and to testify to our children while they plant, water, weed this spring and summer.  Alma 30:44 ...all things denote there is a God; yea, even the earth, and call things that are upon the face of it, yea, and its motion, yea, and also all the planets which move in their regular form do witness that there is a Supreme Creator.


So plant a garden, plant tomatoes and reap all of the amazing blessings that will surely follow by  becoming a little more self reliant.


Penny Pinching Tips to Help Fund Your 3 Month Supply

Here is my magic list of 10 essential green & thrifty cleaning products:

white vinegar
baking soda
lemons and/or lemon juice
salt
olive oil
Ivory bar soap
liquid dishwashing soap 
washing soda
borax
essential oils (I like lemon, lemongrass, & eucalyptus)

1. Bathroom Cleaner:

3/4 c. baking soda
juice from 1/2 a lemon (about 1/4 c)
3 tablespoons salt
 3 tablespoons liquid dishwashing soap
1/2 cup vinegar
10 drops essential oil (optional)
Mix all ingredients together in a medium bowl to make a paste; use scrub brush or sponge to apply to tub, shower walls, & sinks.  (Be sure to test a small area to make sure paste does not scuff tub surface; if so, eliminate the salt from the mixture!  Rinse well with water and a wet rag, then dry with a clean rag or old towel.


2. Toilet Bowl Cleaner:

1 cup baking soda
1 cup vinegar
10 drops essential oil (optional)
Turn off flow valve to toilet & flush 1 or 2 times until water is drained.  Pour in baking soda, then slowly pour in vinegar, being sure to get vinegar to cover as much of the bowl surface as possible, then add essential oil.  The baking soda will react with the vinegar–this is normal!  Use your toilet brush to scrub surface & remove any rings or stains.  Turn water back on and flush.

3. Furniture Polish

3/4 cup olive oil
juice from 1/4  lemon
1 tablespoon vinegar
3-4 drops lemon essential oil (optional)
Dampen rag & squeeze out excess water.  Dip damp rag into furniture polish, the wipe on surface of furniture.  Buff off with an old dry towel.  Can also be used to polish stainless steel!

4. Glass Cleaner

1 1/2 cups vinegar
1 1/2  cups water
5-10 drops essential oil (optional)
Mix vinegar, water, & essential oil together in spray bottle.  Spray on glass & use squeegee, crumpled newspaper (Tip: use newspapers that are at least 2 weeks old to avoid black fingers!), or a lint-free rag to get a streak-free shine.  Also works well to shine chrome and countertops after you’ve disinfected them.

5. All Purpose Cleaning Spray

1 tablespoon borax
1 tablespoon washing soda
1 teaspoon dishwashing soap
1 cup vinegar
4 cups hot water
25-30 drops essential oil (optional)
Whisk all ingredients together well in large bowl, then pour into spray bottle.  Spray on, then wipe surface clean with a damp cloth.  Can be used to clean and disinfect almost any surface!

6. Stainless Steel Cleaner

2 tablespoons baking soda
1/2 cup vinegar
2 cups warm water
Mix ingredients in spray bottle.  Mixture will foam up; when it stops bubbling, put on cap and spray stainless steel surface, then wipe clean & dry with lint-free rag.  To add extra shine, use furniture polish above.

7. Homemade Dishwasher Detergent

1 cup baking soda
1 cups borax
1/2 cup salt
vinegar (add to rinse compartment!)
Mix first three ingredients well & store in airtight container.  To use, add 1 tablespoon to each of the 2 compartments in your dishwasher and 2 tablespoons of vinegar to your rinse compartment.

8. Floor Cleaner

1 cup vinegar
1/2 cup baking soda
8-10 cups hot water
1 tablespoon borax
1 tablespoon washing soda
30 drops essential oil (optional)
Mix vinegar & baking soda together in bucket; add hot water, Borax, washing soda, & essential oil and mix until all powder is dissolved.  Use mop or sponge to wipe down floor; wipe dry with clean dry towel.

9. Homemade Laundry Detergent

1 bar Ivory soap
1 cup borax
1 cup washing powder
This homemade laundry detergent is so cheap and easy to make that you will kick yourself for not trying it until now.  Place Ivory soap in a large microwave safe bowl.  Heat in the microwave for 2 minutes, until soap turns to foam.  Quickly stir foam until it becomes small soap chips, then mix well with borax and washing powder.  Allow to cool completely, then store in airtight container.  Use 1-2 tablespoons per load.  (Tip:  This detergent works best in warm or hot water; for cold water washing you may want to first dissolve in 1/4 c. of hot water.)

10. Fabric Softener

vinegar
essential oil (optional)
Add 1/4-1/2 cup vinegar with several drops of your favorite essential oil to the rinse cycle (or simply place in fabric softener compartment of your front load washer.)


So that’s it….10 ingredients mixed up 10 different ways to create 10 different cleaners.

Now to give credit where credit is due. I got this list from www.livingwellspendingless.com
God bless you in all your efforts.


Wednesday, February 27, 2013

It's Almost Spring, It's Time to Think about Gardening!

One of the best ways to add to your food storage is to plant a garden! Not only will you save money growing your own vegetables and fruit that you would normally buy at the store but you can bottle and preserve them for later use. I haven't bought a bottle of tomato sauce, a can of peaches,  applesauce  or jam in years! It is incredibly empowering to be able to add to your food supply each year by the the food you grow yourself, and it just tastes so much better. February may seem early to start thinking about a garden, but really it's not. And what better way to get through yet another snow day, than to plan your lustrous green garden. Since we have a shorter growing season, here in Utah, it's great to get a head start by planting inside. For example, by planting healthy tomato plants which are 6 weeks to 2 month old as soon as the danger of frost has passed, you gain at least a full month of production in  a short-seaon area. It is also less expensive to purchase seeds and grow your own transplants than to buy them later at the nursery. If you purchase seeds, choose open-pollinated heirloom seeds, rather than hybrid, you can buy the seeds only once, then harvest them each year, dry them and use for the next year, talk about self-reliance! It really is easier than it sounds, for tomatoes, all you have to do is squeeze out the seeds from one tomato, rinse and set out to dry. Store them in a cool, dry place away from light and you can plant them the following year. This only works for heirloom and open-pollinated seeds, not hybrids. I have experimented with the seeds from hybrid plants in the past and have never been pleased, if it worked, it was a freaky mutation, not at all like the parent plant, so stick to heirloom, if you want to be able to keep using your own seeds, year after year. 

There are many products out there that work great for starting transplants, but one method I've found that I really like is simply using 1/2 an egg shell with a hole poked through the bottom in an egg carton. Fill the egg shells with a planting medium/ potting soil. Plant your seeds according to the directions on the package, water and place on your window sill. You won't be able to have a 2 month old tomato plant in an egg shell, but it's a great start and works great for herbs and greens, I'd choose larger containers for tomato plants. I can't go into every detail or this post would be a mile long, there are great resources online. Extension.usu.edu is a great resource. Gardening Tips - Yard and Garden - extension.usu.edu

By the way, you can plant peas right now, as soon as the snow is off the ground. Other cold weather vegetables that can stand some frost are radishes, spinach, swiss chard, beets (not gonna happen at our house), lettuce (some types are hardier than others), cabbage, turnips, onions, cauliflower, broccoli, carrots. Start buying your seeds, plan your garden and get started, it is one of the best ways to have the whole family work towards self reliance. Little kids love to see what they plant grow and are much more willing to eat the vegetables that they planted themselves.

God bless you in your efforts towards self reliance. 

Tuesday, January 22, 2013

Homemade yogurt with instant non-fat powdered milk


Mix 1 quart warm water (like for yeast) with 1 1/3 dry milk powder
Add 1/4 cup yogurt with active cultures (use plain) and mix well.
Pour into quart or 2 quart jars and cover with plastic lids. Place the yogurt in a picnic cooler with two quart juice or 1/2 galloon milk jugs filled with very hot water. Alternate yogurt jars with hot water jugs in cooler. Cover cooler with towel and let stand for 3 hours. Yogurt is ready when it pulls away from jar. If not ready in 3 hours, check every half hour. If you leave it too long yogurt will curdle and smell yeasty. You can still use this for cheese by straining through cheesecloth.
Honestly,  it has always taken longer for me and I have had less luck with this recipe. Maybe my tap water just doesn't get hot enough. But I have know others that prefer this recipe and have had great success and it is a great way to rotate your powdered milk. Good luck!

Monday, January 21, 2013

2013 Resolution!

Hello Everyone


Now that the holidays are over, it is time to get back to work! I have an assignment for everyone. In order to make self reliant/ food storage goals for this new year, first we need to know exactly where we are at. So here it is; I want everyone to make an inventory of everything you have right now, food, water, fuel, savings. Count what's in your pantry and freezer, too. Pass this chore onto the kids, if you can. The more you can make food storage and self reliance a family activity, the better. You'll discover at least two things by doing this. First, I think you'll be surprised by what you already have put aside, and you'll discover areas that are lacking. Once you have a clear idea of where you are at, then you can map out what you need and make some goals to help you achieve it. Remember, "He who fails to plan, plans to fail." Benjamin Franklin. 

It is also a great time to pull out those 72 hr kits and rotate food and clothing if needed. Decide as a family where you need to start. If you don't have an emergency 72 hr kit, that is a great place to start. You'll feel greater peace to be prepared. If you have your emergency kits, make sure you are making progress on your 3 month supply of food and that you have water. I know that it can be very overwhelming, but just start somewhere and you will feel empowered. 

Start putting money aside for a cash reserves, decide how much, even if it's small, and put it aside each pay check. Make a goal to have a certain amount saved or to get out of debt by the end of the year. 

Tips to make that dollar stretch so you can add to your 3 month supply:

DIY Dishwasher Detergent
1.5 cup Washing Soda  (washing soda is a natural water softener, abrasive, and is pure cleaning power – baking soda will only act as an abrasive and is not nearly as effective as washing soda, so I just leave it out)
1/2 cup Borax  (Borax – again, an abrasive not super effective, but I have found it helps with glass, which seems to need a finer abrasive)
1/4 cup Citric Acid (citric acid, which is also used in canning, will counter your washing soda, so you have to be very conservative with it.  But it can be the only way to deal with some hard water marks and residue)
OPTIONAL: 1/2 – 1 teaspoon of Dawn  (this just adds more cleaning power – be very careful with it though, just a small amount or you’ll end up with an overflow of suds all over your kitchen floor)
Double or triple the recipe as needed.  Combine ingredients and shake up real well.   1/4 cup in your “Wash” compartment should be all you need for a whole load of dishes!  
I have found many recipes that only called for Borax and Soda, so see what works for you.
I have had great luck using vinegar in the “Rinse Aid” compartment to help get my dishes shiny and residue free.  Since we have hard water, I ALSO add a splash in the bottom of the washer before starting a load.  I found that it made a huge difference. 


Homemade Crockpot Yogurt
Homemade yogurt is a great alternative for a healthy, inexpensive snack. Flavored store bought yogurt on average has 25 to 35 grams of sugar. (Lowfat yogurt has about 12g) A Snickers bar has 30 grams of sugar, a Hershey’s has 21g. The FDA suggests we eat 32 grams of sugar a day! When you make your own, you know exactly what is in it. It’s so yummy, you really don’t need to add any, especially if you add fruit. Add you save a lot, too!

--8 cups (half-gallon) of whole milk--pasteurized and homogenized is fine, but do NOT use ultra-pasteurized.
--1/2 cup store-bought natural, live/active culture plain yogurt (you need to have a starter. Once you have made your own, you can use that as a starter)
--2/3 cup nonfat dry milk or gelatin to thicken- optional
--frozen/fresh fruit for flavoring
--thick bath towel

This takes a while. Make your yogurt on a weekend day when you are home to monitor.
Plug in your crock-pot and turn to low. Add an entire half gallon of milk. Cover and cook on low for 2 1/2 hours.
Unplug your crock pot. Leave the cover on, and let it sit for 3 hours.

When 3 hours have passed, scoop out 2 cups of the warmish milk and put it in a bowl. Whisk in 1/2 cup of store-bought live/active culture yogurt. Then dump the bowl contents back into the crock pot. Stir to combine. If you want a thicker style yogurt, add 2/3 cups of nonfat powder milk or one packet of unflavored gelatin to the mix after stirring in the yogurt with active cultures. Put the lid back on your crock pot. Keep it unplugged, and wrap a heavy bath towel all the way around the crock for insulation.

Go to bed, or let it sit for 8 hours. In the morning, the yogurt will have thickened--- it's not as thick as store-bought yogurt, but has the consistency of low-fat plain yogurt.
Blend in batches with your favorite fruit. Chill in a plastic container(s) in the refrigerator. Your fresh yogurt will last 7-10 days. Save 1/2 cup as a starter to make a new batch.

If you add fruit to the yogurt it never thickened back up the way the plain did. Freeze in smaller containers and send with your kids in their school lunches, they defrost and stay cold. Works great! Enjoy, it’s so yummy!